For once, this did not start with something of mine breaking. It started with
Peter - a really nice guy I got in touch with completely by chance ;) - whose
motorised “WallWizard” TV wall mount (the kind that swivels the TV left and right
with a remote control) had a dead controller board. So I built him an
open-source, drop-in replacement for it.
The original brain is a sealed, proprietary CLO Systems board (P/N 417-S3-001-00), and when it dies you are basically left with an expensive, motorised paperweight. WallDuino brings it back to life for a few euros of parts
- an Arduino Nano, a single L293D motor driver and a bit of firmware. It keeps the original remote and all of its buttons working - left, right, stop, the two presets and “home” - but because the firmware is now mine, I can do things the sealed original never could: teach it almost any remote and change whatever I like.
Everything - firmware, KiCad PCB and even a DIY veroboard (stripboard) layout - is open source on GitHub: tamasgal/wallduino. This post is a walk-through of how it works and why I built it the way I did.
Why bother replacing the board?
The WallWizard itself is a neat piece of hardware: a motor swings the TV bracket sideways, and a potentiometer on the axle tells the controller where it currently is. The problem is the brain. The original mainboard is a closed black box - if it fails, or you simply want to do something the manufacturer never intended, you are stuck.
The mechanics, the motor and the position potentiometer on Peter’s mount were all perfectly fine and worth saving. I have an obsession with keeping things alive as long as possible, so rather than let the whole thing be binned over one dead board, I designed a replacement that plugs into the same connectors and talks to the same hardware - just with an Arduino brain that I fully control.
How it works
At its core, WallDuino is refreshingly simple:
- An Arduino Nano compatible board does all the thinking.
- An L293D H-bridge drives the mount’s DC motor left and right.
- The potentiometer that already sits on the mount’s axle is read through the
Nano’s analogue input (
A0). A 10-bit reading of 0..1023 maps directly to 0..270°. - An IR receiver listens for the remote.
The firmware runs a tiny closed loop: read the current angle from the potentiometer, compare it to a target angle, and drive the motor in whichever direction closes the gap until it is within 3°. That is really all there is to the positioning - no fancy PID, just “are we there yet?” checked a few thousand times a second.
To make sure the bracket never tries to tear itself off the wall, every target is clamped to a safe range (80° to 200° on Peter’s mount). Each press of left or right nudges the target by about 10°.
Keeping the original remote (and teaching it new ones)
The whole point of a drop-in replacement is that the rest of the household should not notice anything changed, so WallDuino still listens to the original WallWizard remote, which speaks the NEC protocol.
But since I own the firmware now, I did not stop there - I also taught it a Logitech remote, which uses the RC6 protocol. Adding a remote is delightfully low-tech: every button is just a little signature of protocol, address and command, e.g.
const RemoteSignature LEFT_COMMANDS[] = {
  { NEC, 0x1, 0x4A },   // WallWizard
  { RC6, 0x0, 0x6D },   // Logitech, red button
};
Want to use an unused button on your existing TV remote? Enable the serial debug, press the button, read out the protocol/address/command it prints, and drop those three numbers into the matching array. Done - any remote, any button.
Presets and going home
The remote already has two preset buttons, and WallDuino puts them to work like this:
- Press once and the bracket drives itself to the stored position.
- Press seven times quickly and it saves the current position as that preset.
Why seven? Because the Logitech remote cheerfully fires three IR codes for every
single button press, so a naive “press twice to save” would trigger all the
time. Requiring seven presses within a short timeout means that a “normal behaving”
remote needs seven presses and the Logitech needs four extrawurstes ;)
There is also a Home button that parks the TV at a fixed position - handy for getting it out of the way with a single press.
The best part: the presets survive a power cut. They are written to the Nano’s
EEPROM, and a little magic byte (0x42, of course) tells the firmware
whether the EEPROM has ever been initialised. On a fresh chip it writes sensible
defaults; after that it just reads your saved positions back on every boot.
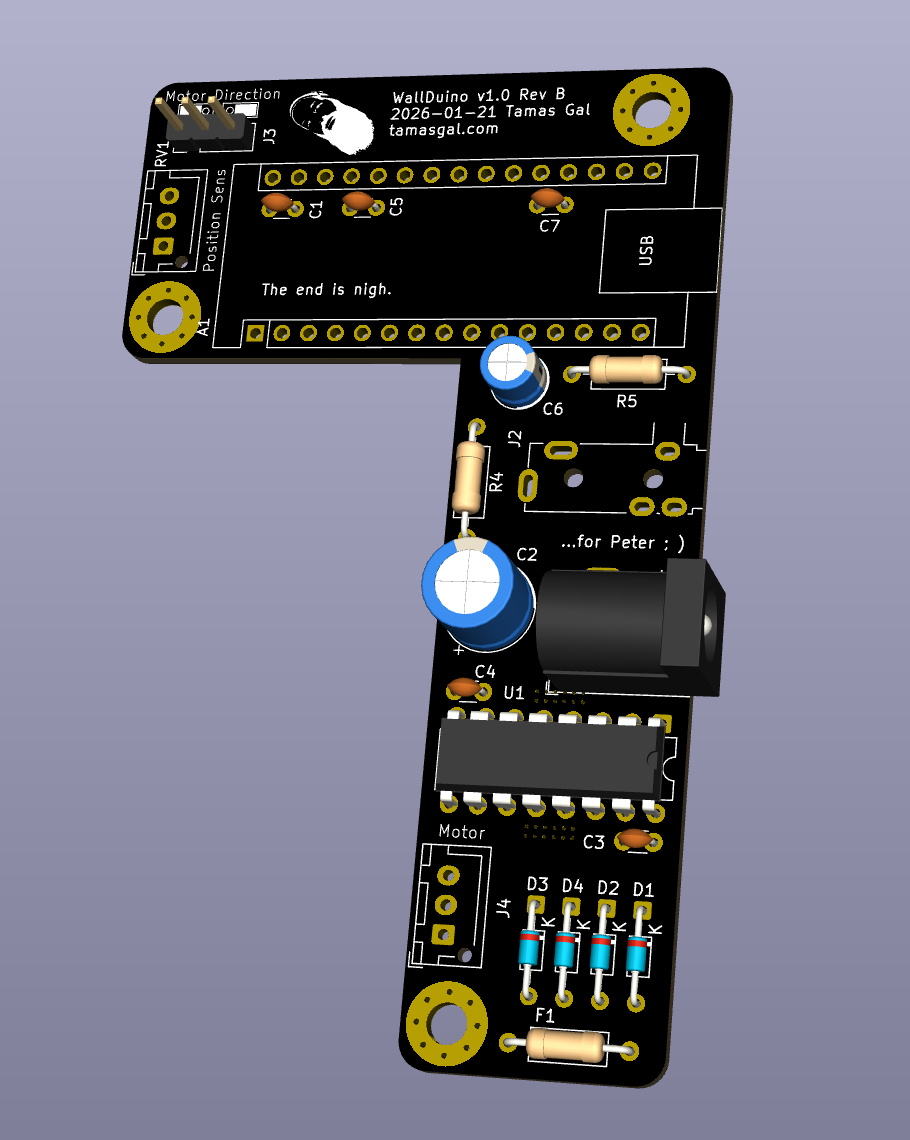
The PCB
The board is designed in KiCad and has already been through two revisions:
- Rev A - the first one that actually worked.
- Rev B - what I would build today:
- much better heat sinking for the L293D (it does get warm when the motor is working hard)
- a few now-unnecessary resistors (R1-R3) removed
- an extra capacitor to smooth the potentiometer signal, which was a little jittery before
Gerbers, schematics and the full KiCad project are all in the repository if you want to have a board fabbed.
No PCB? Build it on veroboard
You do not need a fabricated board to try this. I also drew up a veroboard (stripboard) layout, so you can build the whole thing by hand with a soldering iron and a bit of patience.
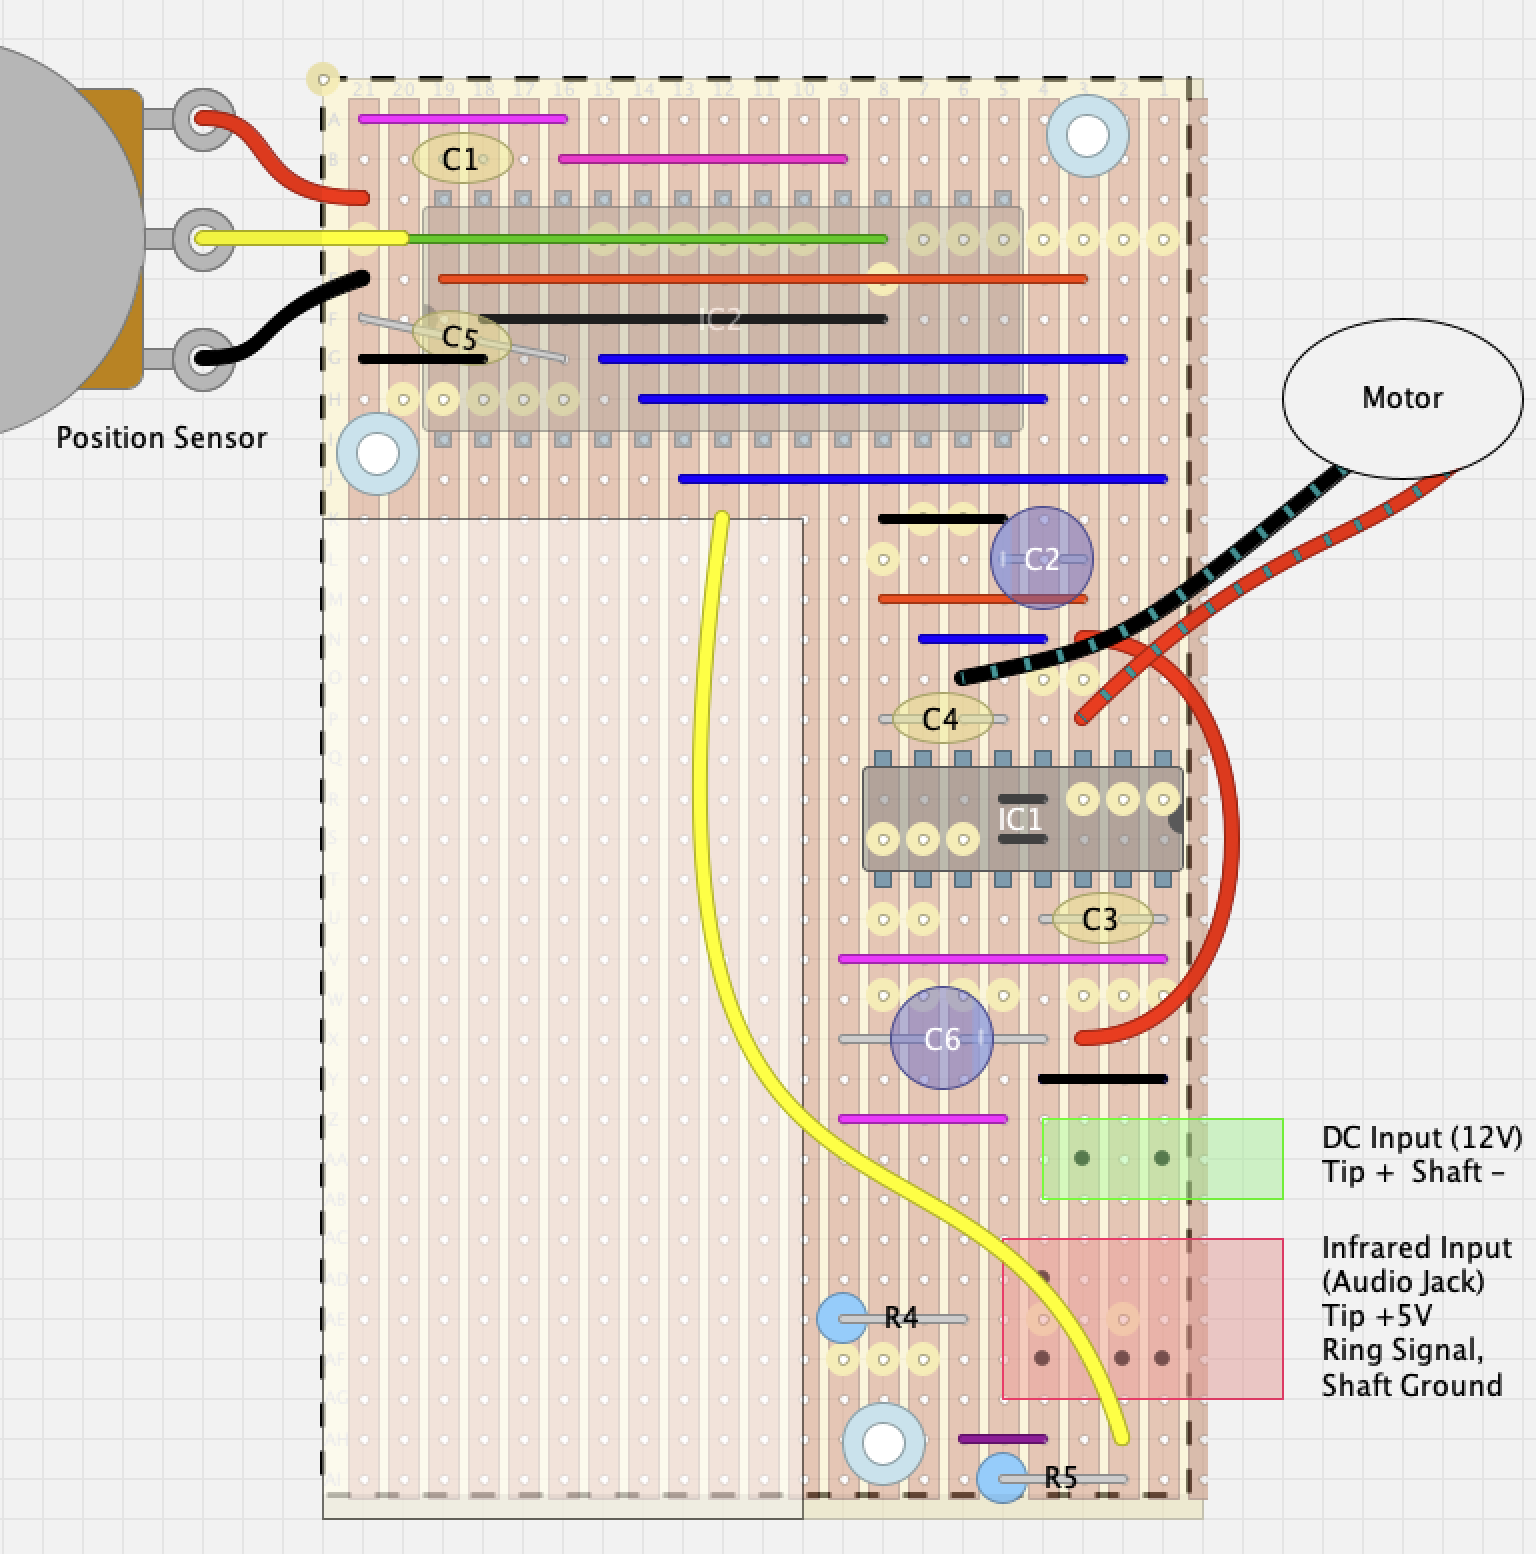
One important catch: the veroboard version is based on the older Rev A pinout, which is not the same as the current PCB. If you build the stripboard version, make sure to adjust the pin definitions at the top of the firmware to match - otherwise nothing will move.
A couple of small touches I am happy with
A few details that are easy to overlook but made my life easier:
- Direction jumper. If your motor spins the “wrong” way, you do not have to swap wires or recompile. A jumper on one input pin flips the sign of the whole control loop, so left becomes right and everyone is happy.
- Safe-range clamping in software. The 80°-200° limits are enforced in the firmware, so a stray remote press can never drive the bracket into the wall or the end stops.
- It is honestly hard to brick. Worst case, you re-flash the Nano over USB.
Compared to
reballing NAND chips on a MacBook logic board,
this is a relaxing afternoon project
;)
Get it and build it
Everything is open source:
- Firmware, PCB and veroboard: github.com/tamasgal/wallduino
- Board: any Arduino Nano compatible
- One dependency: the excellent Arduino-IRremote v4.5 library
- Manual: there is a bilingual (German/English) PDF manual in
docs/for the non-programmers in the room
If you have a motorised WallWizard (or a similar CLO Systems mount) with a dead
controller, do not throw it out - give it an Arduino brain instead ;)